
Personalizing Epoxy Tumblers
Introduction to Epoxy Tumblers
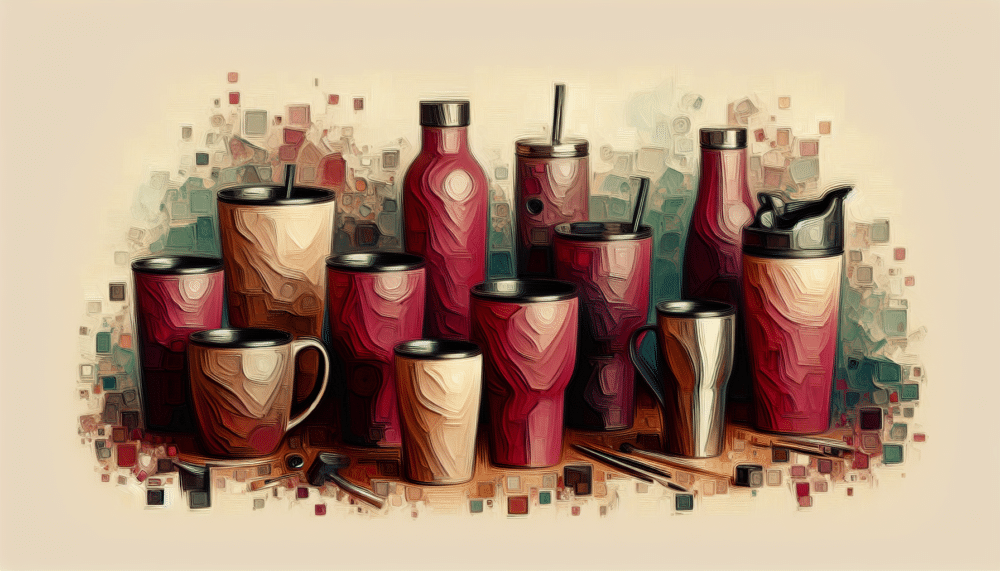
Creating custom epoxy tumblers is my jam! These snazzy drinkware pieces let me sprinkle in some personal flair and whip up heartfelt gifts for friends and family. Epoxy resin tumblers are those insulated cups you can’t get enough of—perfect for everything from beach bonanzas to snuggle-up nights in October.
The magic happens with a stainless steel cup and a shiny armor of epoxy resin. This see-through coat not only dials up the shine factor but also saves the under-the-hood design from life’s bumps and scratches (Pigmently). With a buffet of pigments, glitters, and snazzy embellishments, the customization is only as limited as your imagination.
Why Epoxy Resin Rocks
Crafting with epoxy resin for tumblers? It’s like hitting the jackpot! Here’s why I’m all in, and why you might want to join the fan club:
- Tough as Nails: Scratch-resistant armor keeps those pesky blemishes at bay.
- Shiny for Days: The magic clear coat makes it sparkle like it’s fresh out of a fairy tale.
- Mix and Match: Whether it’s mica powders, glitters, or decals, your combo options are massive.
- Sky’s the Limit: From favorite color palettes to tailor-made gifts, it’s all about you.
| Benefit | What It’s Got |
|---|---|
| Tough as Nails | Keeps scratches and blemishes away |
| Shiny for Days | An eye-catching, glossy surface |
| Mix and Match | Mix it up with design elements |
| Sky’s the Limit | Make it personal with endless options |
Every step of crafting these beauties is as fun as unwrapping a surprise gift. It’s a thrill seeing a piece come to life that has my personal stamp on it. High-quality mica powder pigments deliver bold colors with that super smooth finish we all crave (Pigmently). And don’t get me started about the glitter—fine or chunky, it sprinkles the perfect amount of razzle-dazzle. Using parchment paper, you can easily nail the neatest bling layout.
For fresh inspiration on customizing your tumblers, take a gander at stuff on custom sublimation tumblers and customized glitter tumblers. Let your creativity run wild and make something that’s totally, unmistakably you!
Crafting Epoxy Tumblers
Tumbler Priming and Prep
Let me tell you, the first thing you gotta do when diving into crafting custom epoxy tumblers is set the stage right. I mean, getting that finish just right is like making sure your cake doesn’t stick to the pan. So, I scrub the tumbler down with soap and water to wipe away any sneaky dust and oils. This little wash dance makes sure the primer and epoxy hug the surface nice and tight. Next, painter’s tape becomes my best buddy. I carefully wrap it around places I want to keep epoxy-free, like the rim and base. This not only spruces up the finish but also keeps the drinking area safe (Resin Obsession).
Choosing the right tumbler, oh boy, that’s a game-changer. For those just starting out, stainless steel tumblers are golden, especially double-walled, insulated ones. They’re smooth operators—perfect for epoxy. Once you’re smashing it with those, feel free to level up to cool versions like powder-coated or etched stainless steel tumblers (The Crafty Baking Nurse).
Resin Mixing and Application
Mixing resin is where the magic begins—but let’s not get too excited and forget the instructions on the epoxy resin kit. It’s typically a mix of equal parts resin and hardener in a silicone cup. Stir it up gently—no one likes bubbles crashing the party. When I’m in the mood for some color, I split it up and add some pizzazz with alcohol inks or glitters (Resin Obsession).
Application time! With a silicone brush—or, heck, my gloved fingers—I spread that resin smoothly all over the tumbler. Keep that tumbler turning, or else gravity might play tricks, leaving drip marks you’ll hate. A tumbler turner? Oh, it’s a lifesaver. It keeps things moving, so your resin layer stays even. Want more info on this? Check out our section on using tumbler turners.
Customizing with Pigments and Glitters
This part? It’s where I break out my artistic side. Glitter, pigments—you name it, I’m using it. Fine glitter? Check. Chunky glitter? Double-check. Applying it is like choosing who gets the last piece of pie—you need the right method. Whether it’s epoxy or Mod Podge, test around and find your groove. Adding a topcoat can keep your design safe and sound.
| Material | Use |
|---|---|
| Alcohol Inks | Painting with color |
| Mica Powders | Shine and shimmer |
| Glitters | Bring on the spark |
Parchment paper? Yup, that’s my glitter sidekick. It helps me lay those chunky glitters real smoothly while things are still wet, ensuring they stick like they’re supposed to. Looking for more glittery inspo? Hop over to our piece on customized glitter tumblers.
Stick with these steps and you’ll conjure up a custom epoxy tumbler that’s not just a looker but also built to last. Keep at it, and soon you’ll be the mason of mesmerizing drinkware, all personalized and fabulous.
Best Practices for Epoxy Tumbler Crafting
Making your own epoxy tumblers ain’t just a hobby, it’s a whole vibe! Let’s dive into some sweet tricks to make sure your creations come out as stunning as a sunset cocktail.
Using Tumbler Turners
Trust me, having a tumbler turner is like having the magic wand of smoothness for your resin coat. It keeps that resin from pooling up in sad little puddles or dripping off like awkward art, giving you a glossy masterpiece instead. Always throw an old newspaper or something over your workspace ’cause resin has a knack for getting everywhere. Resin Obsession has your back with tips to keep your space neat and tidy.
Here’s a quick-and-dirty rundown of some tumbler turners you should know about:
| Tumbler Turner | Price Range ($) | Features |
|---|---|---|
| Single Cup Turner | 30-40 | Simple to use for solo projects |
| Double Cup Turner | 50-60 | Turn two cups at once—twice the fun! |
| Adjustable Speed Turner | 70-80 | Let’s you play DJ with resin speed settings |
Hop on over to Amazon or your local craft haunt to snag one of these bad boys.
Choosing Stainless Steel Tumblers
When you’re getting your feet wet, start with stainless steel tumblers. Those double-walled, insulated ones are toughest nails, and perfect for getting the hang of things before jazzing it up with powder-coating or etching that brings out your inner Picasso. I personally swear by these for their never-say-die attitude and simplicity.
| Tumbler Type | Recommended Use |
|---|---|
| Double-Walled Stainless Steel | Rookie run |
| Powder-Coated Stainless Steel | Stepping it up a notch |
| Etched Stainless Steel | Pro-level bling |
Go for the good stuff to make sure your tumblers stay fab years down the line.
Tips for Even Resin Coating
A flawless resin coat ain’t just gonna happen by accident; here’s how to up your odds:
- Keep It Cool (But Not Too Cool): Aim for room temps in the 70-75°F zone while the resin cures, so it feels right at home and bubble-free.
- Heat Things Up: Give your tumbler a little love with a heat torch during the first couple hours post-pour. This’ll kick those bubbles to the curb.
- Keep On Turnin’: A constantly rotating cup is a happy cup, and automated tumbler turners make sure your resin doesn’t clump like mashed potatoes (Craft Resin).
And hey, if you’re looking for a whole heap of other tumbler wisdom, mosey on over here.
Diving into custom epoxy tumblers is a patience game, but man, when you nail it, it’s a glorious feeling. From grabbing the perfect turner to picking out a tough-as-nails tumbler, each step nails down a fantastic drinking companion. For more pizzazz, peek at our customized glitter tumblers guide. Grab your resin, crank up some tunes, and get ready to dazzle! Enjoy every moment, and happy crafting!
Recommended Supplies for Custom Epoxy Tumblers
Jumping into the world of epoxy tumblers can be a blast! But let me tell you, it’s always better when you have the right stuff on hand. Don’t worry; I’ve got your back with everything you’ll need, from epoxy resin kits to those dazzling glitters and pigments. Let’s dive in and find out what’s essential for your tumbler craft game.
Epoxy Resin Kits
Alright, let’s talk about the resin biz. You gotta find a product that’s not just user-friendly but also delivers a killer finish. Here are a couple I’ve personally tried and loved:
- Epoxt Resin Store Tumbler Coating Epoxy Resin Kit:
- What’s Cool: Silky gloss shine, quick to harden, evens out on its own, not too smelly, simple to mix (just a one-to-one ratio), and fights off the sun’s rays.
- What’s Inside: You get a 2-part, 1-gallon setup.
- Why You Need It: It’s your go-to for that clear-as-day, scuff-proof surface on your tumblers.
- Take a Look
- Art ‘N Glow Epoxy Resin for Clear Casting and Coating:
- What’s Cool: Safe for food, no pesky bubbles, and made right here in the USA.
- What’s Inside: A neat 16-ounce combo.
- Why You Need It: Perfect for a bunch of stuff — molds, crafts, tumblers, you name it.
- Take a Look
Glitters and Pigments
Want to add some pizzazz to your projects? Glitters and pigments are your best friends. They can turn a simple tumbler into a shiny masterpiece or a vibrant showpiece.
- The Epoxy Resin Store:
- What They’ve Got: Whether you need resins for fun crafts or heavy-duty jobs, they’ve got colors, pigments, and glitters to wow.
- Why You Need It: Brighten up your projects with bold hues and twinkling glitz.
- Take a Look
Tumbler Crafting Starter Kits
Just getting started or want to upgrade? A tumbler crafting starter kit is where it’s at. These kits bundle all the essentials you’ll need to kick your crafting into high gear.
Recommended Starter Kits
- Basic Starter Kit:
- What’s Included: A beginning set of resin, mixing doodads, and your everyday glitter/pigments.
- Perfect For: Newbies itching to go wild with custom epoxy tumblers.
- Advanced Starter Kit:
- What’s Included: Resin, a tumbler spinner, and extra sparkly pigments/glitters.
- Perfect For: Folks ready to step up their creativity with cooler tools.
| Kit Type | Inside | Best For |
|---|---|---|
| Basic Starter Kit | Epoxy resin, mixing tools, glitters/pigments | Begginers in Crafting |
| Advanced Starter Kit | Epoxy resin, tumbler turner, advanced pigments, glitters | Crafters with Experience |
Having the right gear makes creating personalized epoxy tumblers way simpler — trust me. Gather your resin kits, sprinkle in some color, and get your all-in-one kits to produce tumblers that’ll wow your friends.
Looking for more ways to glam up your designs? Visit our customized glitter tumblers page for a sparkle how-to.
Curing and Handling Epoxy Tumblers
Whipping up a custom epoxy tumbler sounds like a crafty dream, but it takes a bit more than just getting your hands sticky. You’ve got curing, cleaning, and some safety 101 to keep your tumbler looking sharp and ready to handle coffee, tea, or whatever your heart desires.
Getting the Cure Just Right
Think of curing epoxy like baking your favorite cake—the right conditions make all the difference. As soon as the resin hits the tumbler, the hardening magic starts. It’s like watching paint dry, only more satisfying.
Here are the deets:
- Toasty Temps: Keep things cozy between 70-75°F. This sweet spot lets the epoxy settle over 24-48 hours.
- Spin Cycle: Your tumbler deserves the full rotation treatment—give it a twirl for 8-10 hours using a tumbler turner. Trust me, your arms will thank you for skipping manual turning.
- Layer Up: Building up layers? Sand lightly between each one so they stick together like besties.
- Bubble Control: Can’t have bubble trouble; hit that resin with a heat torch right after you pour to pop those pesky bubbles.
Keeping it Squeaky Clean
Of course, you want that shiny finish to last. Keep these cleaning tips in your back pocket:
- Handwash Only Zone: Dishwashers are a no-go. Stick to handwashing to dodge heat damage and keep the sparkle.
- Gentle Does It: Go with mild dish soap and a soft sponge. Avoid anything too tough that could rough up the resin’s surface.
- Forget Extremes: Don’t drag it into a sauna or freezer—extreme temps make resin sad and crack-prone.
Safety First, Always
Playing with epoxy isn’t all fun and games; you need to keep it safe. Channel your inner safety officer with these tips from Pigmently:
- Breathe Easy: Stick to well-ventilated areas; you really don’t want to be breathing in those fumes.
- Suit Up: Gloves and a mask aren’t overkill. They keep those chemicals off your skin and away from your lungs.
- Stay Tidy: A clean workspace is your best friend, and spilling resin isn’t as cute as it sounds.
Stick to these handy tips and your epoxy tumblers will be the talk of the town (or at least your kitchen). Ready to get flashy with glitters and pigments or thinking of a wild new design? Dive into our other articles for inspo that’s sure to dazzle.
Creating Unique Epoxy Tumbler Designs
Making custom epoxy tumblers is my playground for creativity. I love putting a personal twist on drinkware that has my unique stamp on it. Here’s a peek into some of my favorite designs that I whip up.
Glitter Tumblers
If you like your tumbler to sparkle brighter than a disco ball, glitter tumblers are your jam. I start off slathering a layer of smooth epoxy resin on the outside—trust me, this stuff is tougher than a two-dollar steak, so it’s totally ready for daily coffee runs (MakerFlo Crafts).
Here’s my no-fuss recipe for dazzling glitter tumblers:
- Pre-game by prepping your tumbler with a base coat.
- Mix up your epoxy resin like you’re the potion master.
- Get crazy with fine and chunky glitters while the resin is tacky. Pro tip: Parchment paper is my best friend when I don’t want glitter all over the kitchen (The Crafty Baking Nurse).
- Let it chill and add another resin layer to lock that glitter in place.
I’ve got more glittery wisdom in my customized glitter tumblers guide if you’re curious.
Rhinestone Embellished Tumblers
When I’m feeling fancy, rhinestones come out to play. Here’s my bling blueprint:
- Prime like a painter, then brush on your epoxy layer.
- Dab on some adhesive and get those rhinestones aligned in your snazzy pattern.
- Once everything sits pretty, finish with one more coat of epoxy to keep those stones from jumping ship.
Mixing sizes and colors of rhinestones cranks the wow factor up to max.
Laser Engraved and Hydro Dipped Tumblers
Now, if we’re talking wizardry, laser engraving, and hydro dipping take custom epoxy tumblers to a whole new level. Laser engraving lets me etch detailed designs with a flick of a switch. Hydro dipping, though, is like showing off artwork on water—just super cool. Both methods leave a lasting impression.
Laser engraving goes like this:
- Tumbler ready and resin applied? Check.
- Let the laser engraving machine do its magic for that precise touch.
For the water art known as hydro dipping:
- Start by priming your tumbler.
- Print a design on hydrographic film, then it’s bath time—layer it on the water’s surface.
- Gently dip the tumbler through the film for an evenly coated masterpiece.
For more cool ideas, swing by my custom epoxy tumblers guide.
DIY epoxy tumblers aren’t just about creating drinkware—they’re about making small works of art, full of glitter, rhinestones, or advanced techniques like laser engraving and hydro dipping. Every tumbler tells a story, my story.
One thought on “Custom Epoxy Tumblers: Capturing Memories with Love”